
How to Draw Eyes: A Step-by-Step Guide for Beginners

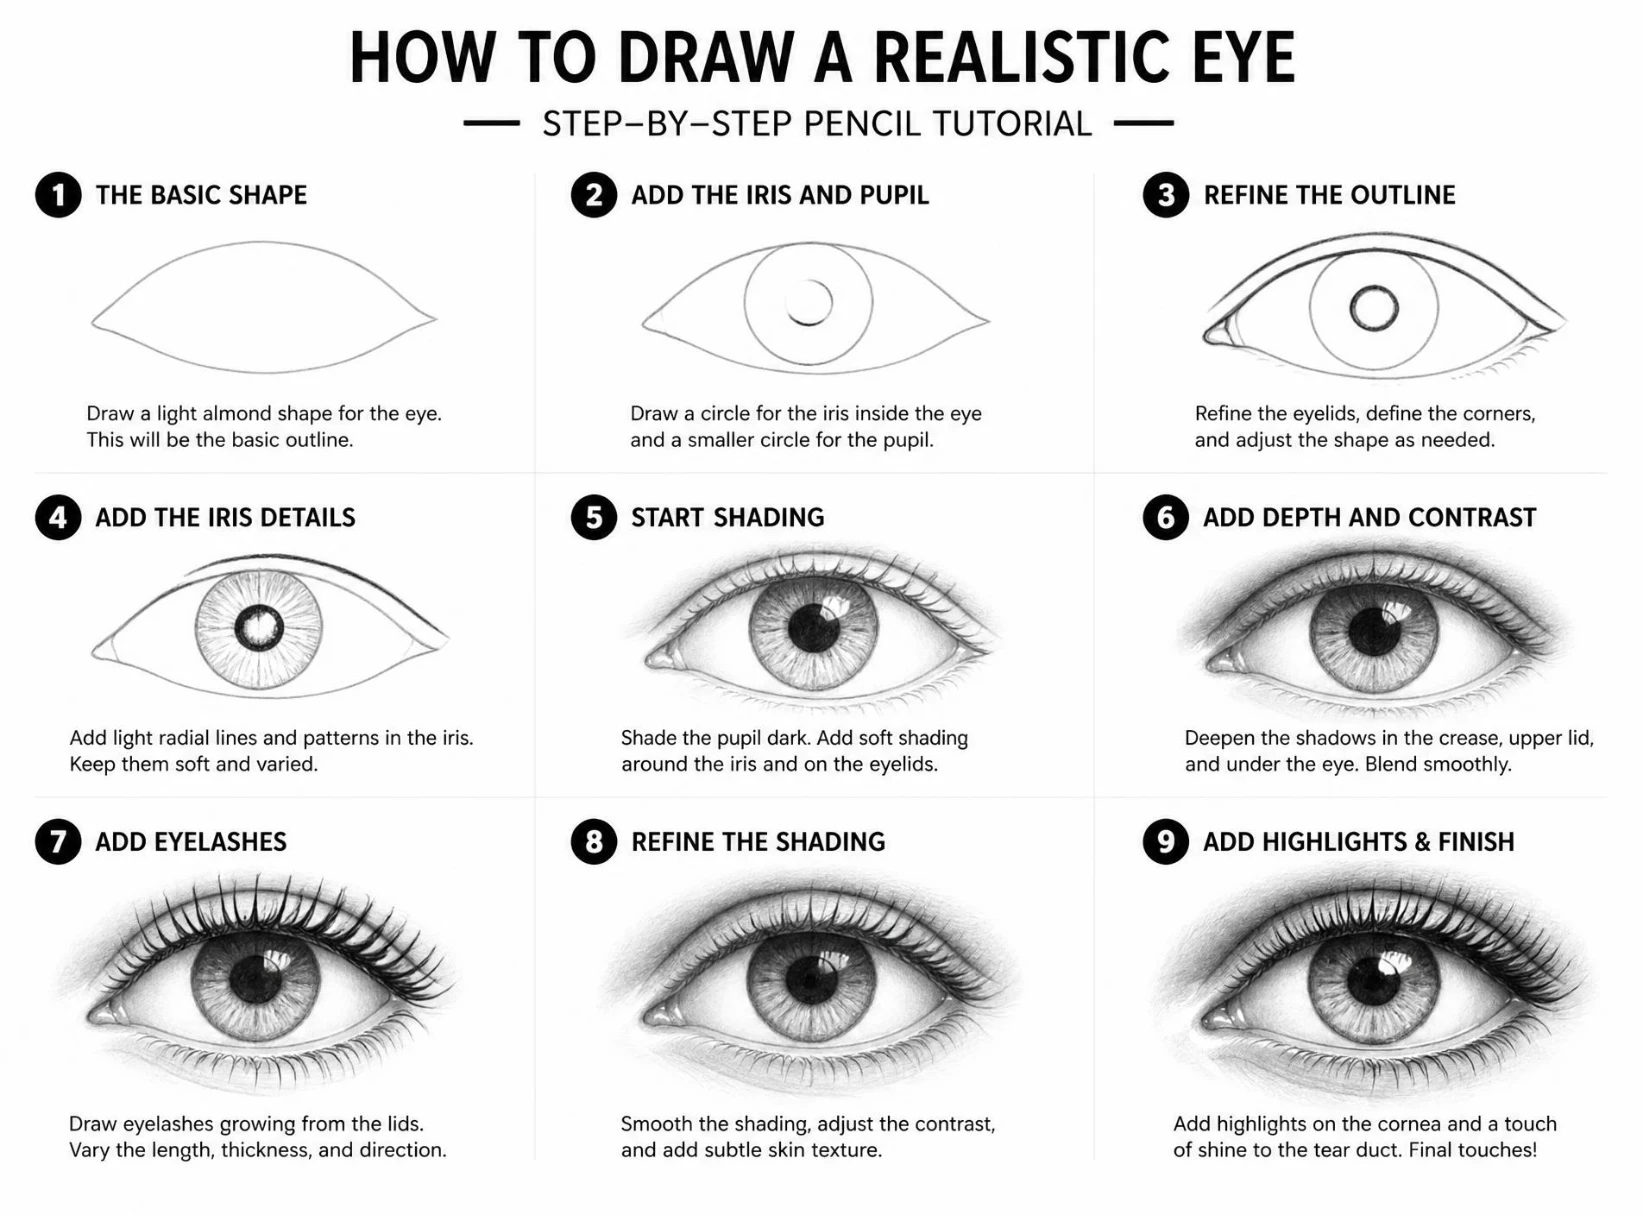
Eyes are called the window to the soul — and also the single hardest feature most beginners try to draw.
If you’ve ever given up on a portrait because the eyes looked flat or lifeless, you’re not alone. The good news is that realistic eyes come down to a handful of repeatable steps: shape, shading, and a few key highlights. This how to draw eyes guide breaks the process down so anyone, from total beginners to more experienced sketchers, can draw eyes that actually look alive.
What You’ll Need
A few basic supplies are all you need to get started: a regular pencil (HB), a softer pencil (2B or 4B) for shading, a good eraser, a blending stump or cotton swab, and plain paper. Having a reference photo of a real eye nearby also makes a huge difference while you’re learning proportions.
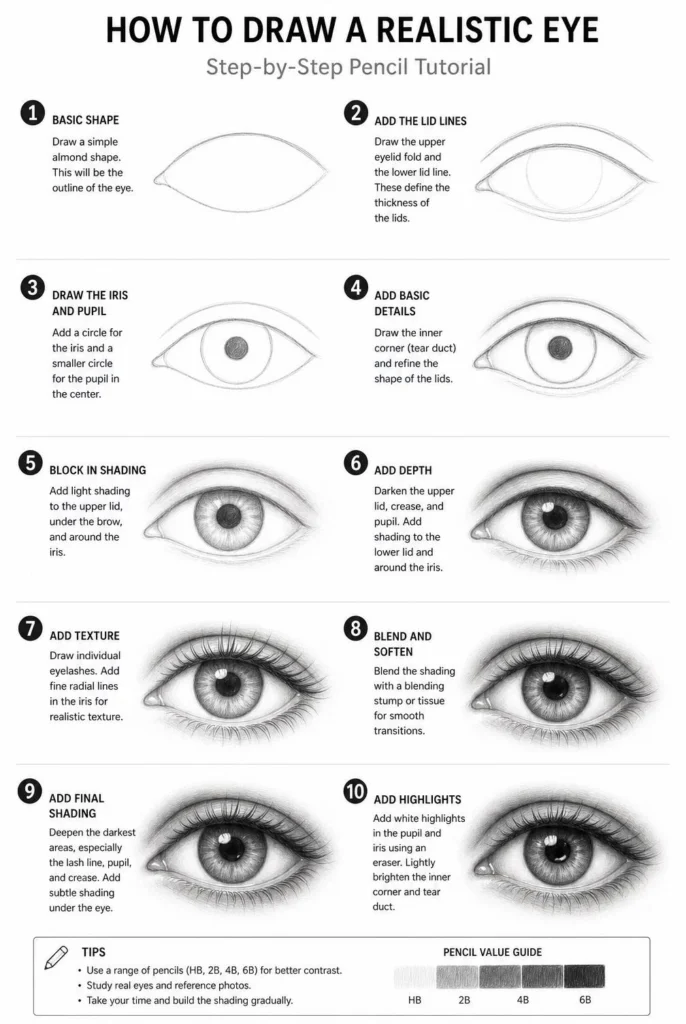
Step 1: Draw the Basic Almond Shape
Start with a simple almond or leaf-like shape, slightly curved on top and bottom, meeting at soft points on each end. Keep this first outline light, since you’ll be adjusting it as you add detail.
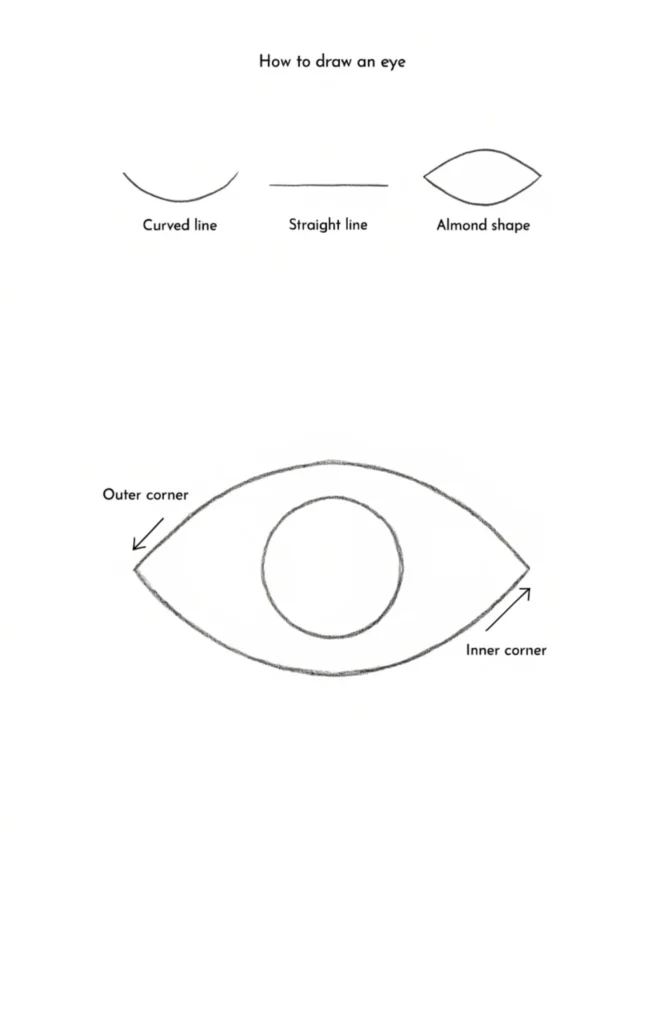
This shape is the foundation for everything else, so take a moment to get the proportions roughly right before moving on. Real eyes are rarely perfectly symmetrical, so a slight variation actually looks more natural.
Step 2: Add the Waterline and Upper Crease
Just inside the bottom lash line, add a thin curved line for the waterline, and above the top lid, sketch a soft curved line for the eyelid crease. These small details are what start to give the eye real dimension instead of looking like a flat cartoon shape.
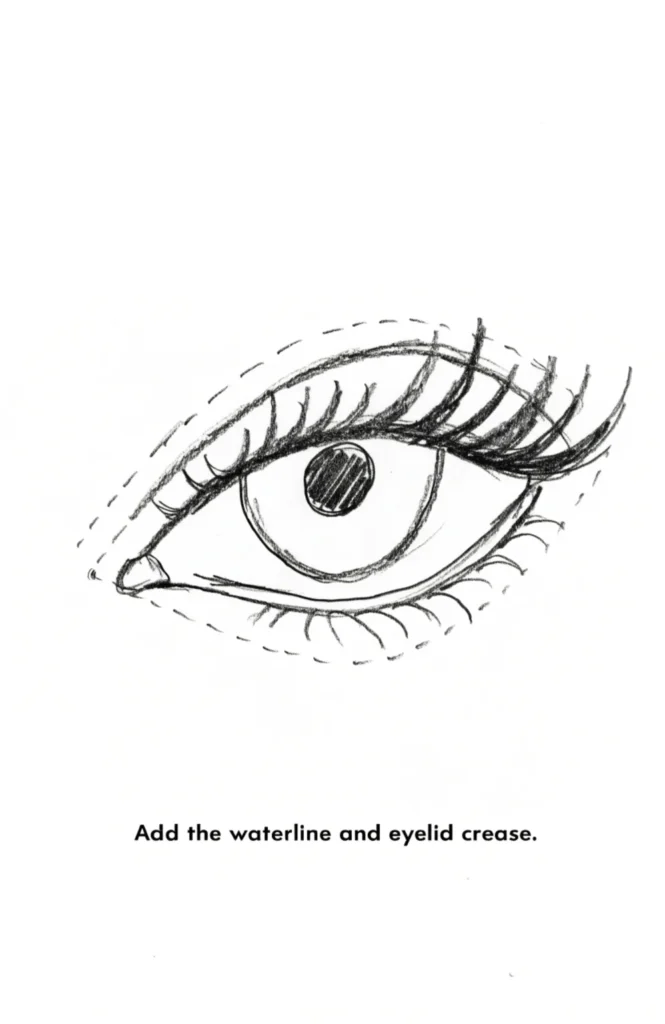
Keeping these lines light and slightly irregular mimics how eyelids actually fold in real life. This step is easy to rush, but it’s key to a believable final result.
Step 3: Draw the Iris and Pupil
Draw a circle for the iris, positioned so that the top and bottom are slightly tucked behind the upper and lower eyelids rather than floating in the center. Inside it, draw a smaller circle for the pupil, keeping both perfectly round.
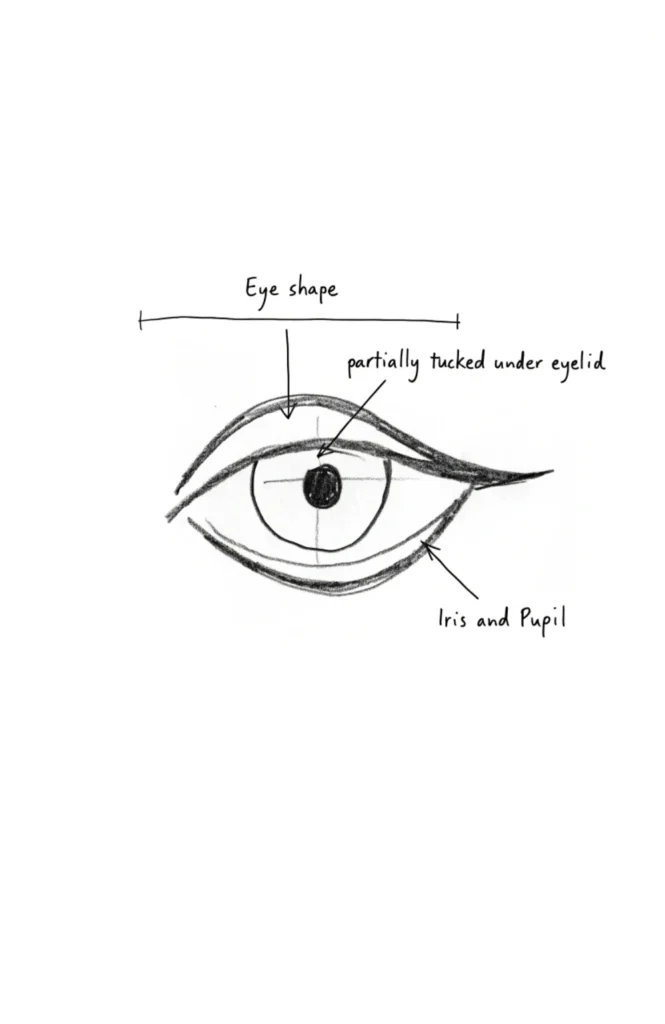
Because the iris is partially covered by the eyelids in a natural gaze, resist the urge to draw a complete, fully visible circle. This detail alone makes a huge difference in realism.
Step 4: Add Eyelashes
Sketch short, tapered lines along the upper lash line, angling them slightly outward and varying their length and spacing for a natural look. Add a few shorter, sparser lashes along the bottom lid as well.
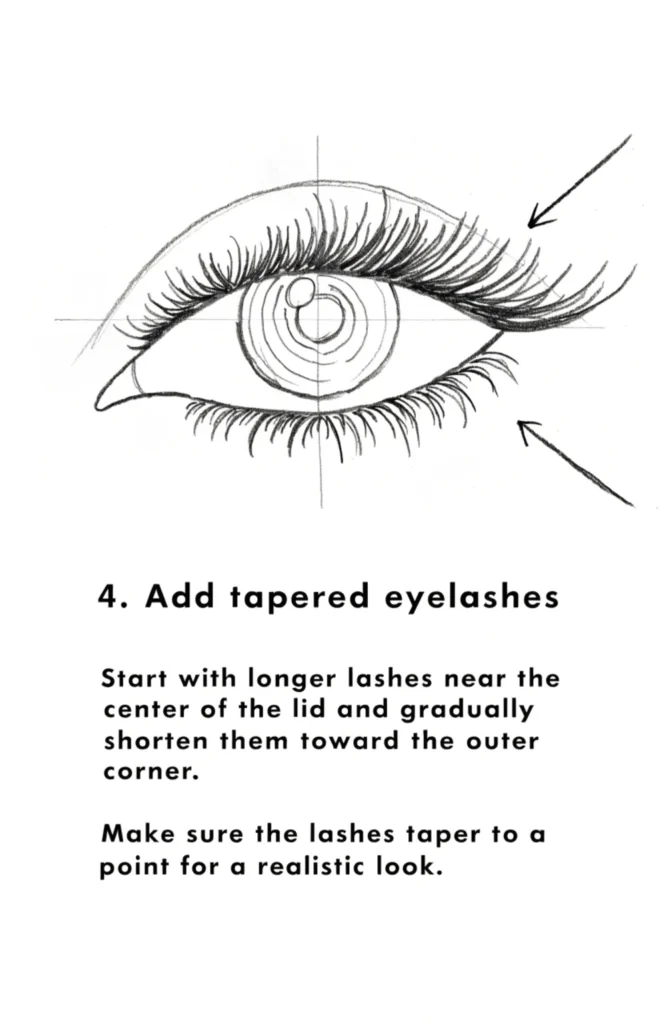
Avoid making every lash the same length and angle, since real lashes grow in slightly uneven clusters. Grouping two or three lashes together here and there looks far more convincing than perfectly even spacing.
Step 5: Shade the Iris for Depth
Using your softer pencil, shade the iris with small lines radiating outward from the pupil, leaving the very edge and a small highlight area lighter. This radiating texture is what makes an iris look like layered colored tissue instead of a flat gray circle.
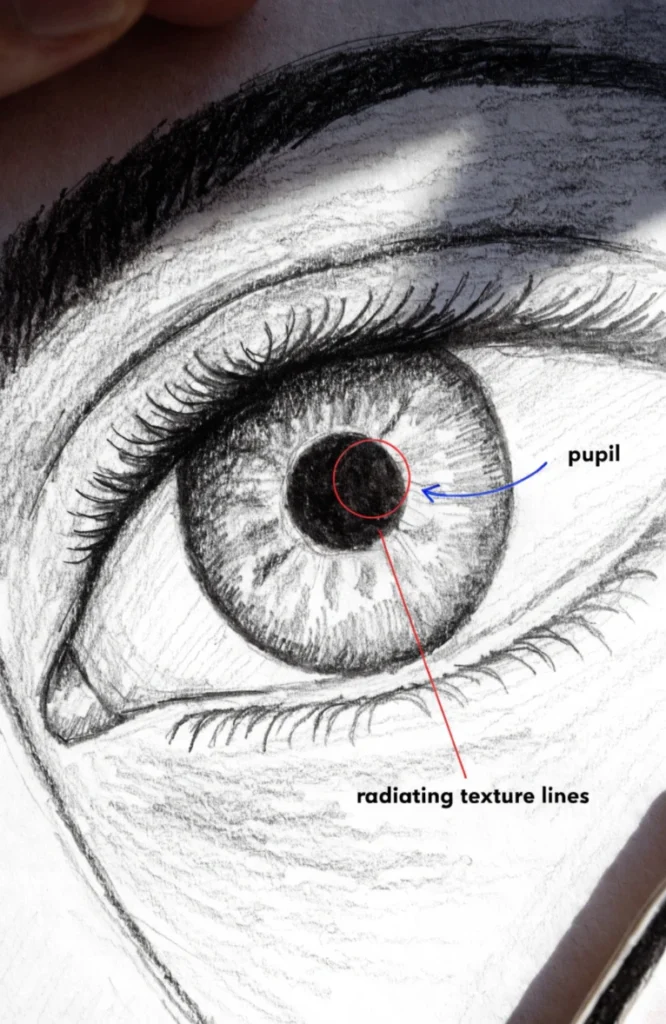
Darkening the outer ring of the iris slightly, while keeping the area around the pupil a bit lighter, adds convincing depth. This is one of the most rewarding steps once you see the eye start to feel three-dimensional.
Step 6: Add Shadows and Highlights
Shade the upper eyelid crease, the inner corner of the eye, and just beneath the lower lash line to create soft shadows that ground the eye in the face. Then use your eraser to lift out one or two small, bright highlight dots on the iris and pupil.
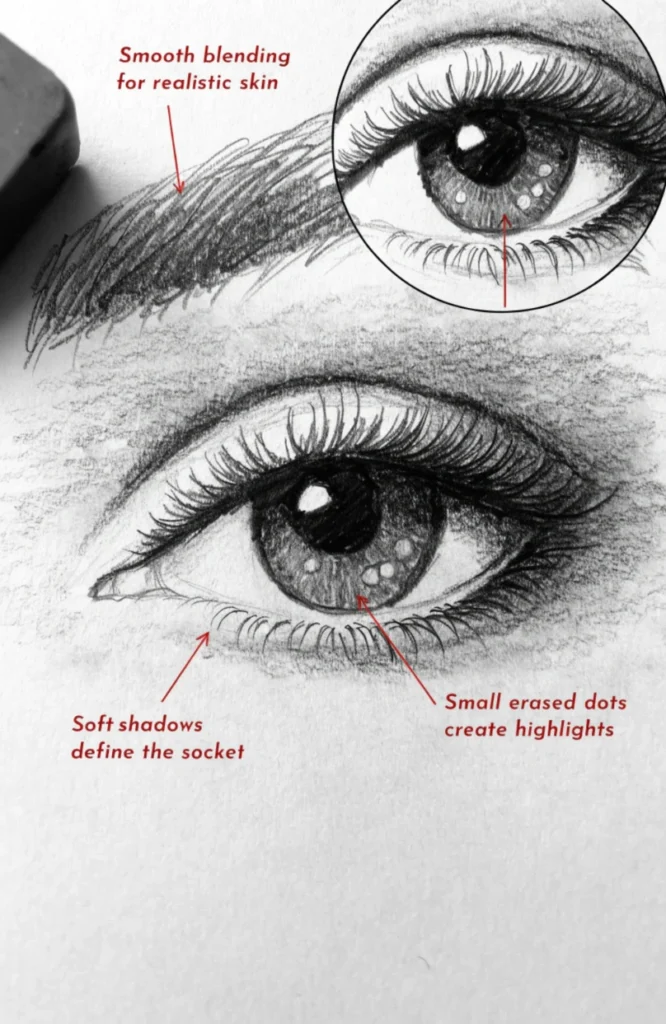
These highlights are what make an eye look genuinely wet and alive rather than drawn. Placing them in the same spot on the iris and slightly overlapping the pupil sells the illusion of light reflecting off a curved, glossy surface.
Step 7: Draw the Eyebrow
Sketch the eyebrow using short, feathery strokes that follow the natural direction hair grows, starting thicker near the nose and tapering thinner toward the outer edge. Avoid drawing one solid, thick outline, since it reads as flat and unnatural.
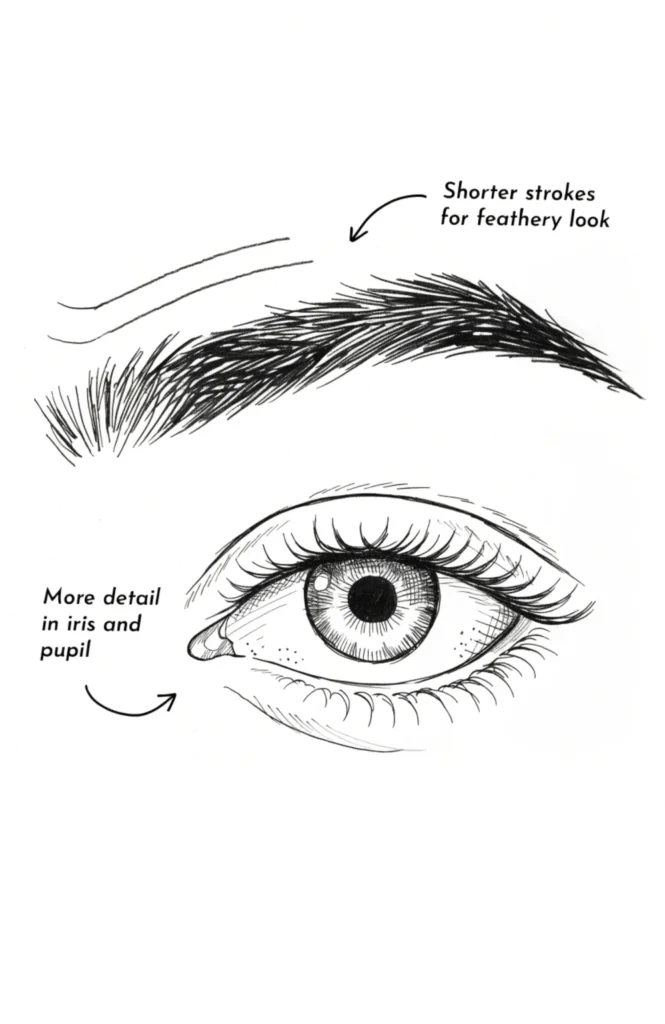
Layering several short strokes on top of each other, rather than a few long ones, creates the illusion of individual hairs. This finishing touch frames the eye and completes the overall expression.
Step 8: Blend and Add Final Details
Using a blending stump or cotton swab, gently soften the shaded areas around the crease and lower lid so the tones transition smoothly rather than looking sketchy. Go back in with a sharp pencil afterward to re-darken the pupil and lash lines for crisp contrast.
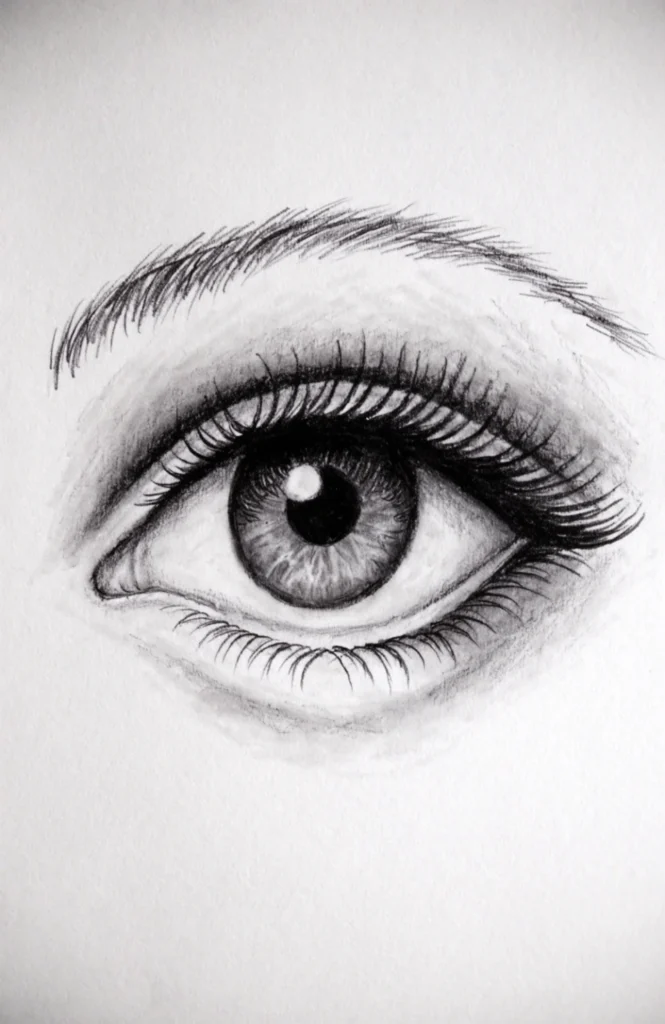
This final pass is what separates a rough sketch from a polished drawing. Take your time here, since smooth blending is often what makes the biggest visual difference in the finished piece.
Tips for Drawing Realistic Eyes
- Study real reference photos. Even experienced artists rely on references, since real eyes have subtle asymmetries and details that are easy to forget from memory.
- Don’t outline the iris in solid black. A hard black circle looks cartoonish; real iris edges are soft and blend into the surrounding shading.
- Leave a highlight. Skipping the bright spot on the iris is the most common reason a drawn eye looks dull instead of alive.
- Vary your pencil pressure. Pressing harder for dark areas like the pupil and lighter for soft shadows creates far more depth than a single flat pressure throughout.
- Practice the shape on its own. Drawing just the almond outline and crease a few times before adding detail builds confidence with proportions.
Frequently Asked Question
Why do my drawn eyes always look flat or cartoonish?
Flat-looking eyes are almost always missing two things: a soft, radiating shading pattern inside the iris instead of a solid flat color, and a small erased highlight where light would naturally reflect. Adding gradual shadow around the crease and lower lash line, rather than a hard black outline around the whole eye, also makes a big difference in realism.
Final Thoughts
Drawing realistic eyes isn’t about natural talent — it’s about understanding the handful of details that separate a flat shape from a lifelike one: soft shading, a believable highlight, and lashes that vary in length and angle. With this how to draw eyes guide and a little practice, you’ll notice a real improvement after just a few attempts.
Keep a reference photo nearby, be patient with your shading, and remember that even a slightly imperfect eye with the right highlight and shadow placement will look more convincing than a technically neat one without them.