How to Organize Kitchen Cabinets with 12 Genius Tips
Learning how to organize kitchen cabinets can completely transform the way your space functions. When every item is stored with purpose, daily cooking and cleanup become more efficient and less stressful. Cabinets often become cluttered with mismatched containers, rarely used appliances, and wasted vertical space, turning meal prep into a daily challenge. Instead of adding more storage, the key is maximizing what you already have with smart, intentional solutions.
Understanding how to organize kitchen cabinets begins with aligning storage choices to your everyday routine. By grouping similar items together, using adjustable shelves, pull-out bins, and utilizing unused areas like cabinet doors or corners, you can create a system that supports both function and aesthetics. Whether you’re working with a compact layout or a spacious kitchen, these thoughtful strategies will help create a clean, efficient, and clutter-free space that works for your lifestyle.
| Category | Ideal For | Recommended Tools | Common Mistakes to Avoid |
| Vertical Storage | Baking sheets, trays, cutting boards | Dividers, tension rods | Stacking horizontally |
| Pull-Out Drawers | Pots, pans, deep storage | Glide-out trays, metal baskets | Stuffing without visibility |
| Lazy Susans | Spices, condiments, small jars | Rotating trays, corner organizers | Letting them collect dust |
| Stackable Shelf Risers | Plates, mugs, dry pantry items | Tiered shelves, cabinet inserts | Not labeling levels |
| Door-Mounted Organizers | Foil, wraps, cleaning items | Hooks, racks, magnetic strips | Wasting back-of-door space |
Start with a Full Cabinet Reset
The first and most important step in learning how to organize kitchen cabinets is doing a full reset. Empty every cabinet completely so you can assess your space, clean surfaces, and evaluate what items you actually use.

During this process, discard expired goods, duplicate gadgets, broken lids, or anything you haven’t used in over a year. Decluttering before organizing helps avoid cramming and sets the foundation for an efficient system.
Once everything is out, take the time to deep clean. Use warm water and mild soap or a vinegar spray for wood. Dry surfaces thoroughly to prevent mold or damage.
Now that you’re starting with a blank slate, categorize your items bakeware, utensils, dry goods, cleaning supplies, etc. This makes it easier to assign dedicated zones later.
Decluttering can be overwhelming but is absolutely worth it. This first reset changes how you view your space and how well your system functions over time.
Group Items by Zone and Frequency
After decluttering, understanding how to organize kitchen cabinets effectively means thinking in “zones.” Keep cooking utensils near the stove, mugs near the coffee machine, and cutting boards near prep areas.

Also consider frequency daily use items like plates and cups should go on lower shelves within easy reach, while seasonal items can be stored higher up or in less accessible cabinets.
By placing things according to how and when you use them, your kitchen becomes more intuitive. No more hunting for spatulas while something burns on the stove.
Use labels if necessary, especially if you live in a household with multiple cooks. Clear zones reduce clutter over time and help others stick to the system.
Zone-based storage isn’t just about convenience, it’s about reducing friction in your daily tasks and creating a natural rhythm in your kitchen.
Use Stackable Organizers and Shelf Risers
Cabinets are often tall, but stacking items without structure leads to chaos. Stackable organizers and shelf risers are must haves when figuring out how to organize kitchen cabinets smartly.

Use risers for canned goods or dishes so nothing gets buried. Stack mugs or bowls without risking breakage. Transparent bins can keep snacks tidy, while tiered racks work great for spices.
Shelf risers help utilize vertical space especially in deeper cabinets and make everything visible at a glance. This reduces waste and prevents overbuying duplicates.
Pick organizers that fit your cabinet depth and leave space to easily remove and replace items. Avoid overfilling the shelves leave “breathing room” to maintain accessibility.
The goal is visibility and access, not just storage. Good organizers help keep things upright, clean, and within reach.
Maximize Corner Cabinets with Turntables or Pull-Outs
Corner cabinets are tricky. If you really want to master how to organize kitchen cabinets, focus on solving those dead zones. Lazy Susans or pull-out trays make corner storage actually usable.

Turntables are great for storing condiments, oils, or small jars just spin to access. For larger items like pots or blenders, install L-shaped pull out shelves that fully extend.
Use these spaces for grouped categories like baking essentials or lunch packing supplies. Just make sure items are lightweight enough to avoid tipping or jamming.
If building custom cabinetry isn’t an option, look for adjustable modular units designed for corner fit. They can work in almost any standard cabinet size.
This area, often wasted, can become a functional powerhouse with the right tools.
Hang Tools and Use Door Storage
Cabinet doors are a goldmine for extra storage, especially when learning how to organize kitchen cabinets in small or cramped kitchens. Use hooks, racks, or magnetic strips to hang tools, measuring spoons, or oven mitts.

Install a small wire rack inside a cabinet door to hold aluminum foil, cling wrap, or sandwich bags. Under sink doors can store sponges or gloves. For safety, avoid placing anything too heavy or sharp on door storage.
Adhesive hooks are great for renters, while screw in racks offer more durability. Always test door clearance to ensure nothing gets crushed when closing.
Maximizing vertical door space keeps surfaces and drawers clear, improving efficiency and accessibility.
Don’t overlook doors, they’re the easiest upgrade for serious space optimization.
Label Everything for Easy Identification
One of the simplest but most effective tips for how to organize kitchen cabinets is to use labels. Whether it’s bins, jars, or shelves, labeling helps keep everything in its place and ensures everyone in the household can follow the system.
Use chalkboard labels, printed stickers, or even clear label tape for a clean, uniform look. For pantry items like grains or snacks, label both the container and the shelf where it belongs. This helps prevent misplacement and keeps the layout intuitive.
Labels are especially useful in shared kitchens or busy households with kids. Clear identification avoids rummaging and unnecessary mess. You can also include expiration dates on labels to keep dry goods in check.
If you have a label maker, you can standardize the design, font, and size. Choose waterproof labels for areas near the sink or stove to ensure durability over time.
A labeled kitchen feels polished, thoughtful, and easy to maintain once you start, you’ll wonder how you managed without it.
Store Lids and Containers the Smart Way
Nothing causes chaos in cabinets like mismatched food containers and lids. Mastering how to organize kitchen cabinets means finally solving the container clutter.

Start by matching every container with its lid and discard any extras or warped pieces. Nest containers by size and store lids vertically in a file style rack or a shallow bin. You can also use a dish drying rack inside a cabinet for upright lid storage.
Consider using one cabinet or deep drawer exclusively for containers to avoid mixing them with cookware. If possible, switch to a single brand or shape of containers for uniform stacking and easier storage.
Transparent bins can help corral all the pieces together and make pulling out the set you need much simpler. Add labels to indicate sizes or use categories like “Lunch Prep” or “Leftovers.”
This small upgrade will save you from daily frustration and make your kitchen function much more smoothly.
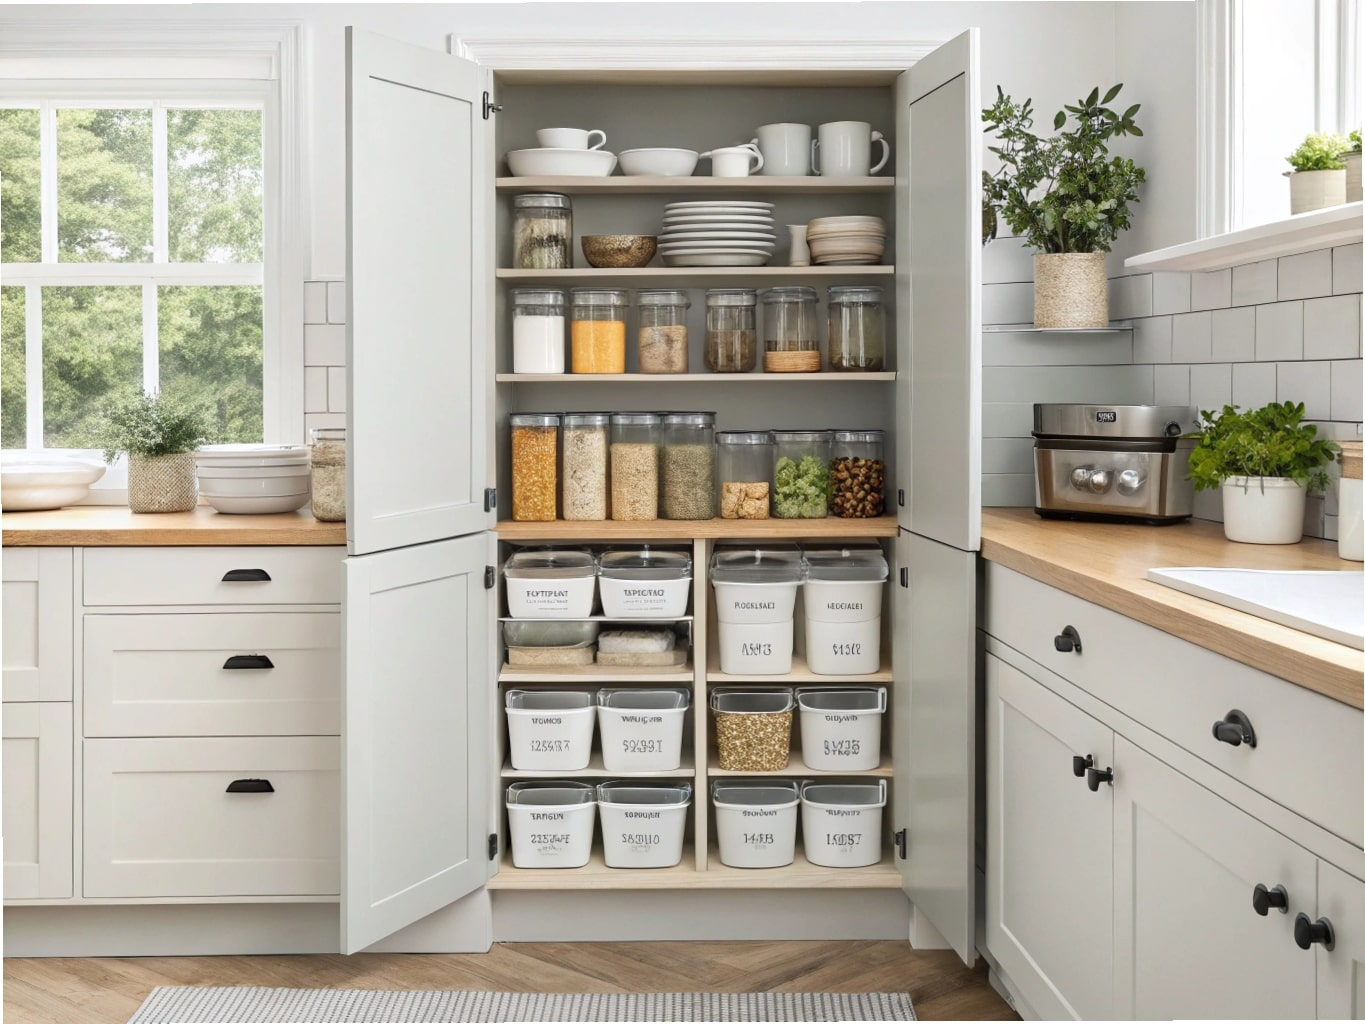
Use Clear Containers for Pantry Items
Transparency is key when it comes to pantry organization. One of the most helpful hacks for how to organize kitchen cabinets is switching bulky boxes and bags for clear, airtight containers.
Clear bins help you easily see contents and know when it’s time to restock. Use them for flour, sugar, rice, pasta, cereal, and snacks. Stackable options make the best use of vertical space and create a sleek, streamlined look.
Always label your containers and consider adding cooking instructions on the back using removable stickers. Square or rectangular shapes are more space efficient than round jars.
Use the same type or brand of container for a consistent aesthetic. Organize by category grains together, snacks together, baking items in one row and store items in a way that makes sense for your cooking flow.
Clear containers not only make your cabinets beautiful but also keep ingredients fresher for longer and prevent spills.
Install Pull-Out Shelves and Glide Systems
Deep lower cabinets often become a black hole. Installing pull-out shelves or glide systems is a smart solution for anyone looking to master how to organize kitchen cabinets practically.

These shelves slide out like drawers, giving you easy access to pots, pans, and small appliances. No more bending or digging at the back of the cabinet. You can buy pre-made kits or have them custom installed for a perfect fit.
Use different levels of glide outs for storing bulky pots at the bottom and lids or baking pans up top. Add tension rods or dividers within the shelves for better item separation.
They’re especially helpful for seniors or people with mobility issues who want an accessible kitchen without remodeling the entire layout.
Though they require an upfront investment, pull out shelves pay off in long term ease, visibility, and space optimization.
Keep the Sink Cabinet Tidy and Functional
The under-sink area is often the most neglected and messy space. But learning how to organize kitchen cabinets includes transforming even this tricky area into a functional zone.

Start by clearing it out and placing a waterproof liner to protect against leaks. Use stackable drawers, under sink shelving, or tiered baskets to separate supplies like dish soap, scrubbers, trash bags, and cleaning sprays.
Door mounted caddies work well for gloves, sponges, or a roll of trash bags. If space allows, add a small tension rod to hang spray bottles upright this frees up floor space for bins or bulkier items.
Avoid overloading this cabinet. Stick to essentials and store overflow cleaning products elsewhere to keep the space light and accessible.
A tidy sink cabinet can help make daily cleanup smoother and encourage better maintenance habits overall.
Designate a Cabinet Just for Spices
Spices often get scattered across the kitchen, making them hard to find and easy to forget. One great strategy for how to organize kitchen cabinets is to dedicate one cabinet exclusively to spices.

Install tiered spice racks, drawer inserts, or magnetic strips on the inside door. Alphabetize your spices or organize by cuisine Italian, Indian, baking, etc. for quicker access while cooking.
Use matching glass jars for a uniform look, and clearly label the tops or fronts. Make sure lighting in that area is good or consider using stick on lights for better visibility.
If you’re short on space, consider vertical pull-out spice racks that fit between your oven and cabinets slim but very efficient.
Keeping spices in one dedicated, organized space makes meal prep smoother and helps avoid unnecessary repurchases.
Create a Kid-Friendly Cabinet Zone
If you have children, a kid-friendly section is a must when deciding how to organize kitchen cabinets for a family household. Designate a lower cabinet just for them with plates, bowls, cups, and snack containers.

Use soft plastic or bamboo items that are safe and easy for small hands. Include small bins or baskets so kids can help themselves and participate in kitchen routines like setting the table or packing snacks.
Label shelves with words or images to make it even easier for toddlers and young kids. This encourages independence and teaches responsibility early on.
Keep the cabinet away from sharp or hot areas like the oven or under sink. You can even add a small step stool nearby for access to countertops under supervision.
A kid-friendly kitchen zone turns organizing into a fun, family inclusive task and builds healthy habits for everyone.
Conclusion
Knowing how to organize kitchen cabinets can make a huge difference in your kitchen’s functionality and overall feel. By decluttering, grouping items by zones, using smart storage solutions, and labeling everything clearly, you’ll create a clutter free and efficient space. Organizing your cabinets to match your daily routines will save you time and stress during meal prep. With these tips, your kitchen cabinets will stay neat, accessible, and easy to maintain. It’s time to transform your kitchen into a well organized and welcoming space!
FAQs
1. What is the best way to organize kitchen cabinets?
The best way is to group similar items together, use vertical space with shelf risers, install pull-out drawers for deep cabinets, and keep everyday items within easy reach.
2. How do I start organizing my kitchen cabinets?
Start by emptying all your cabinets and sorting items by category. Discard or donate anything you no longer use, clean the shelves, and then place items back based on frequency of use.
3. What should not be stored in kitchen cabinets?
Avoid storing heavy appliances on high shelves, flammable items near heat sources, or rarely used cookware in prime cabinet spots. Keep hazardous materials like cleaning supplies away from food storage.
4. How can I maximize space in small kitchen cabinets?
Use vertical dividers, stackable bins, under-shelf baskets, and lazy Susans. Consider door-mounted organizers and slim pull-out racks to access hard-to-reach areas.
5. How often should I reorganize my kitchen cabinets?
Review and reorganize your cabinets every 3 to 6 months to keep them functional. Seasonal cleanouts help you remove expired items and adjust storage based on changing needs.