How to Draw a Face: A Step-by-Step Guide for Beginners

Almost every beginner artist hits the same wall at some point, drawing a face that technically has all the right parts but somehow still looks off in a way that is hard to explain.
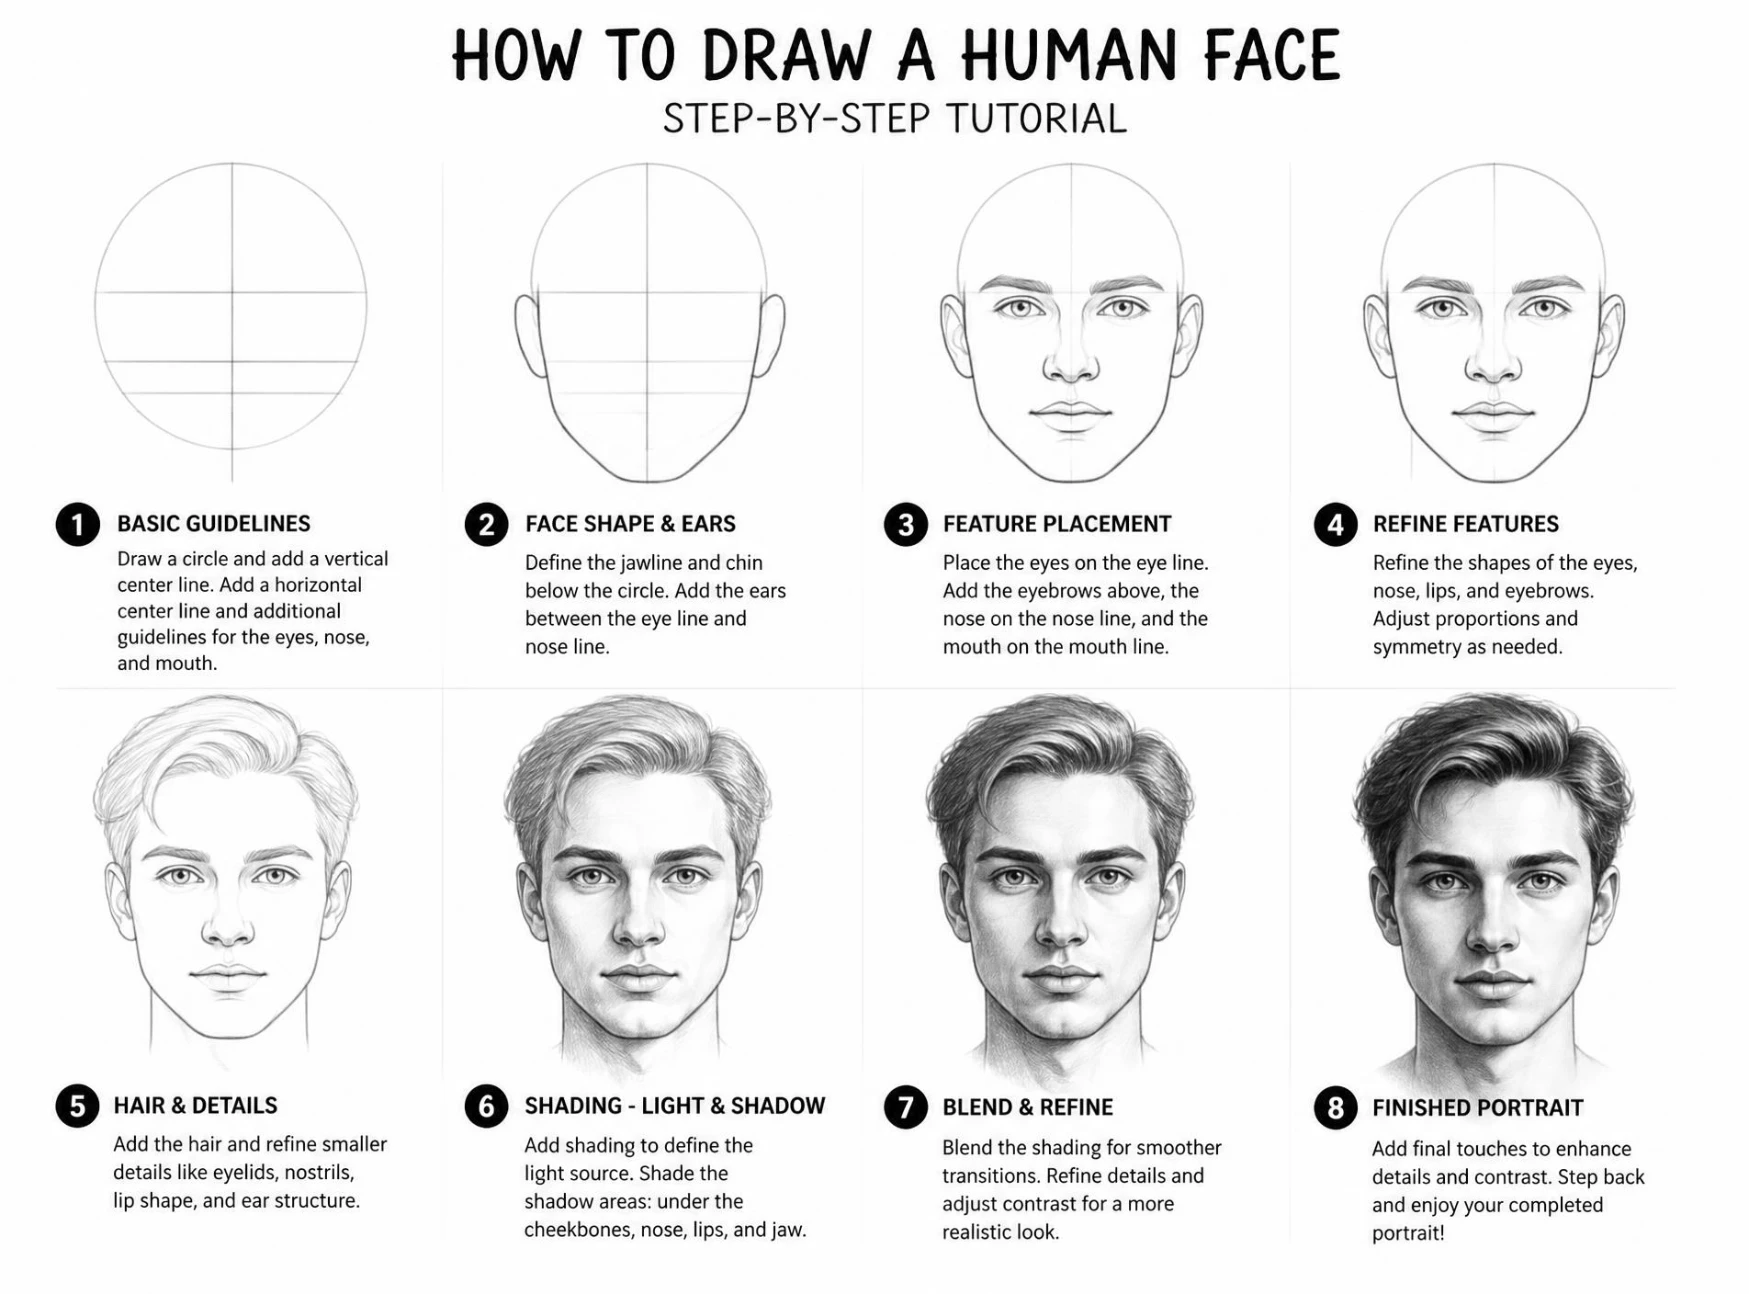
The reason usually has nothing to do with talent and everything to do with proportion. Faces follow a set of fairly consistent measurements from person to person, and once you understand where the eyes, nose, and mouth actually sit in relation to each other, drawing starts to feel a lot less like guessing. This guide walks through how to draw a face using simple guideline shapes that work whether you are sketching from imagination or copying a reference photo.
None of the steps below require advanced technique, just a willingness to build the face slowly in layers rather than trying to get every detail right on the first pass. Keep your early lines light, since most of them are just scaffolding that will be erased later.
What You’ll Need
A regular pencil for sketching, a softer pencil for shading, a good eraser, and plain paper are all you need to start. A ruler can help with the early guidelines if you want extra precision, though a steady hand works just as well with practice.
Step 1: Draw an Oval for the Head
Start with a simple oval, slightly narrower at the chin than at the top, to represent the basic shape of the skull and jaw. This does not need to be perfectly symmetrical, since real heads rarely are.
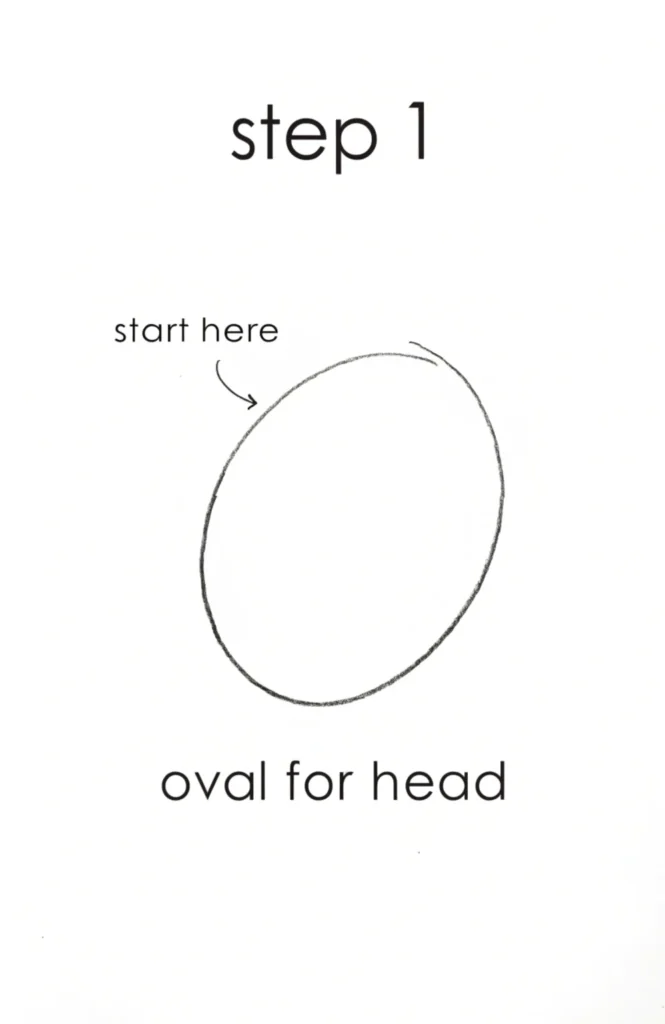
Keeping the oval light in pencil pressure makes it easy to adjust later once you begin placing features inside it. This shape sets the proportions for everything that follows.
Step 2: Add the Center Guidelines
Draw a vertical line down the center of the oval and a horizontal line across the middle. These two lines are the most important part of the whole process, since nearly every feature on the face lines up against them in a predictable way.
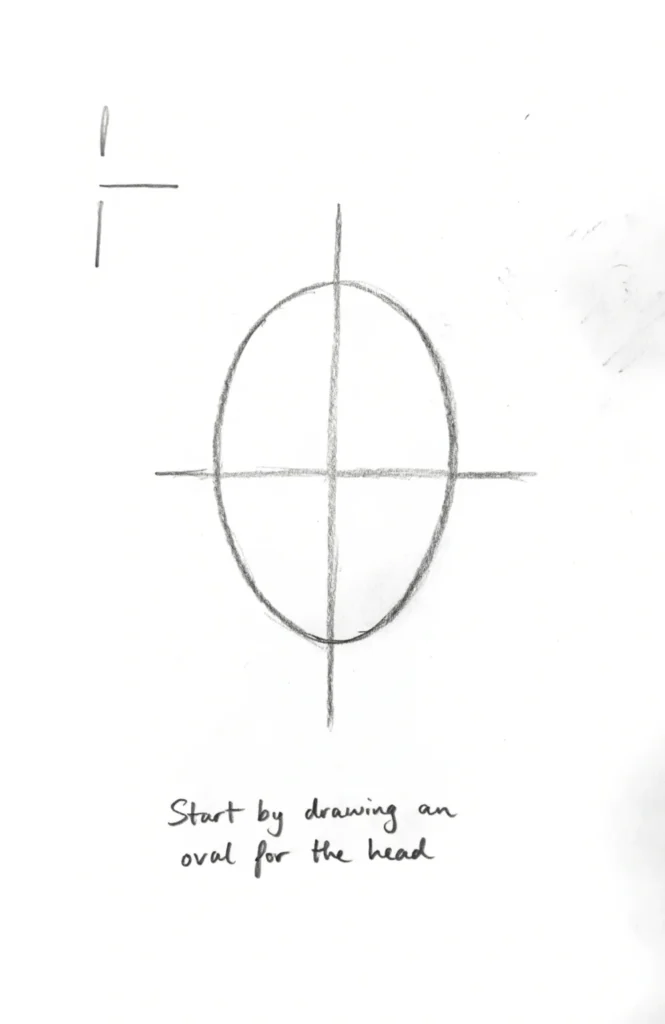
If you want the face turned slightly to one side rather than facing forward, curve these guidelines gently instead of keeping them straight, which helps the features wrap naturally around the form.
Step 3: Place the Eye Line
The horizontal center line you already drew is where the eyes sit, which often surprises beginners since it feels too low compared to how most people imagine a face. Mark two small points along this line, leaving roughly one eye width of space between them.
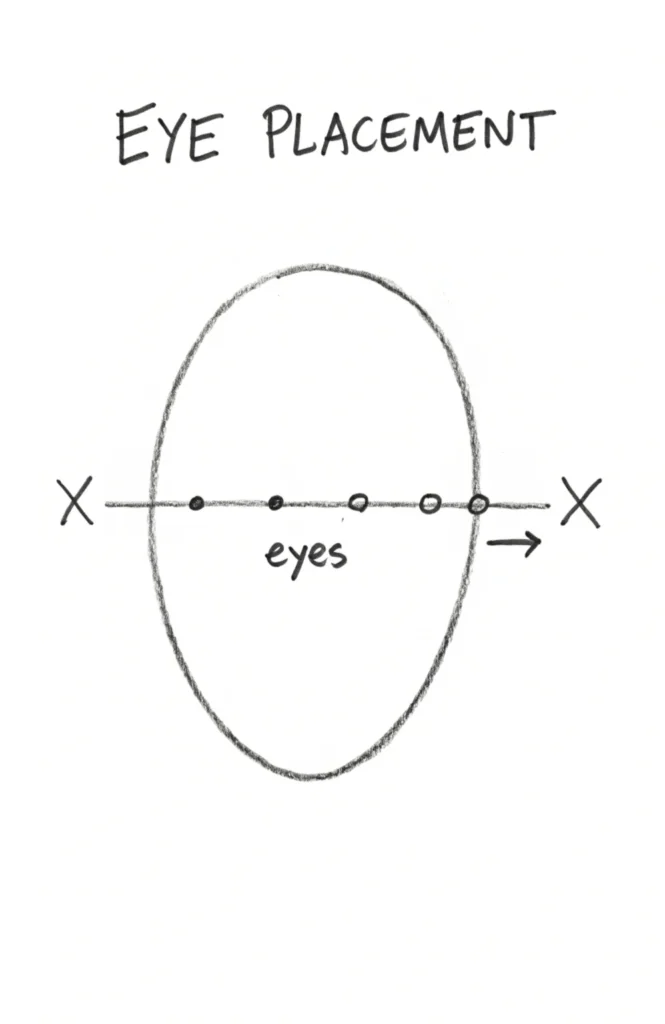
This single measurement, one eye width apart, is one of the most useful proportion rules in figure drawing and applies to most adult faces regardless of shape.
Step 4: Position the Nose and Mouth
Measure the distance from the eye line down to the chin, then mark the halfway point for the bottom of the nose. The mouth typically sits about a third of the way between the bottom of the nose and the chin.
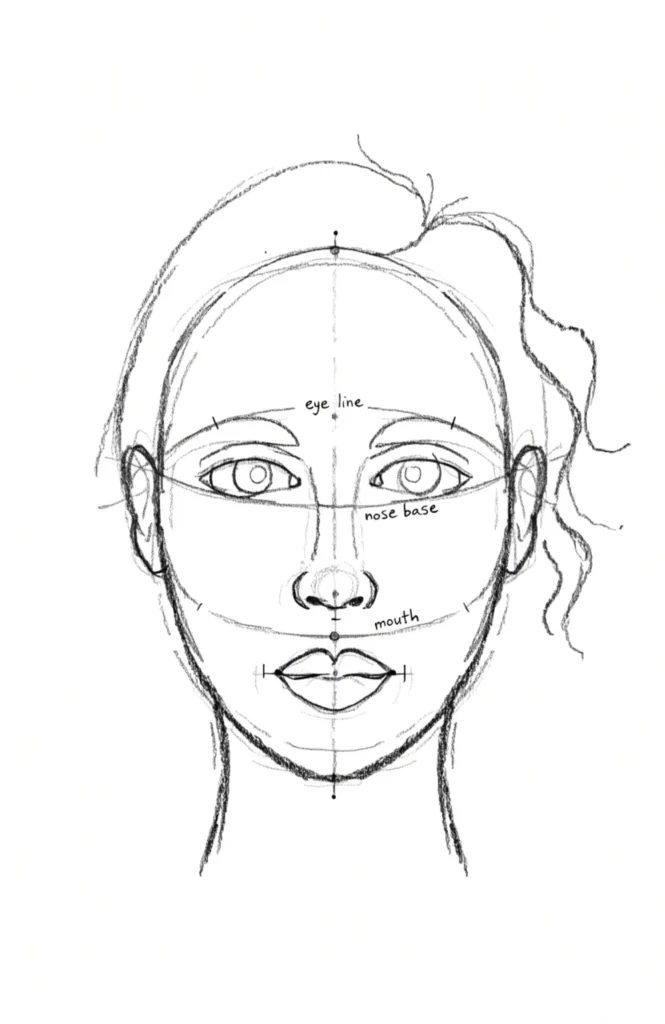
These measurements will not be exact for every single face you draw, but starting from this baseline gives you a reliable structure to adjust from rather than guessing placement from scratch each time.
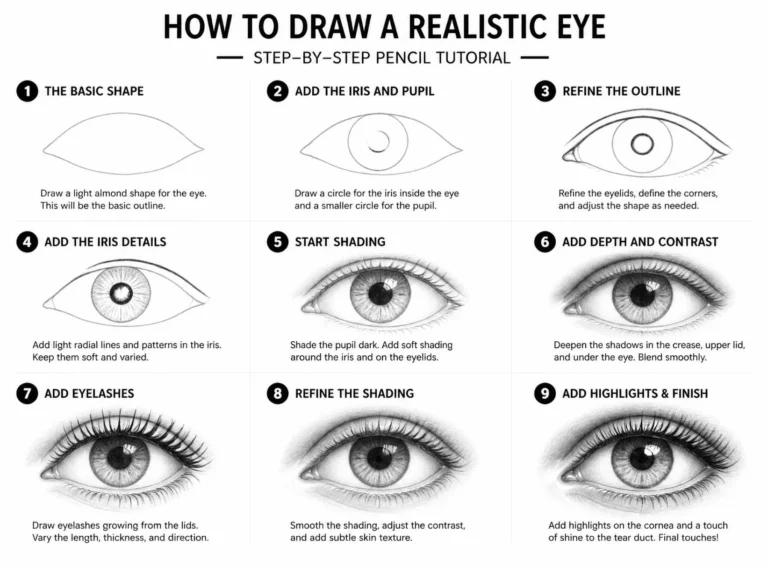
Step 5: Sketch the Eyes and Eyebrows
Using the eye line as your base, sketch two almond shapes at the marked points, then add eyebrows just above them following a similar curve. Keep the far eye slightly smaller if the face is turned to one side, since it sits farther from view.
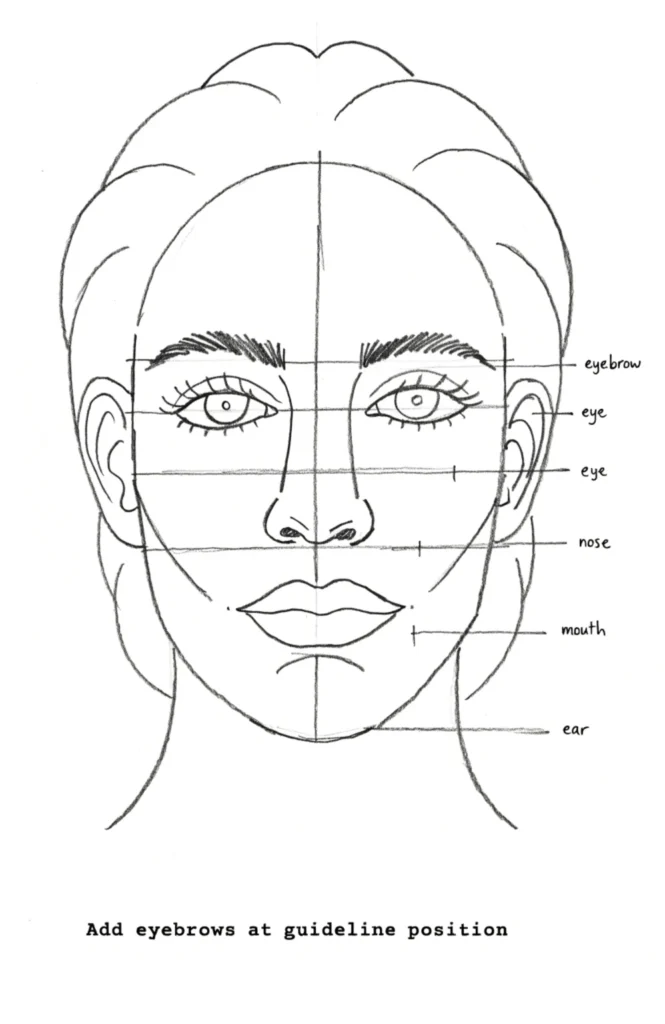
This is a good moment to add a bit of personality and expression, since the angle and shape of the eyebrows change the whole mood of the face.
Step 6: Sketch the Nose and Mouth
At your nose guideline, draw two small curved lines for the nostrils and a simple line or subtle shading for the bridge above them. At the mouth guideline, sketch two curved lines for the lips, keeping the top lip slightly thinner than the bottom one in most cases.
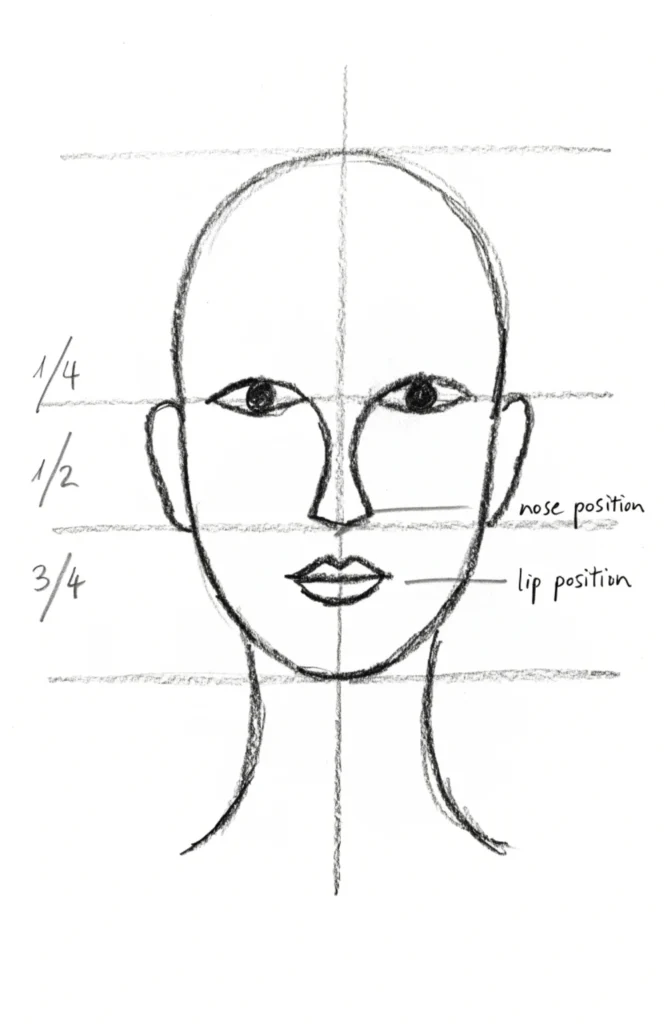
Avoid outlining the entire nose with hard lines, since noses are mostly built from shading and subtle contour rather than a clean outline.
Step 7: Add the Ears and Hairline
Ears typically span from the eye line down to the base of the nose, which is another proportion that surprises a lot of beginners the first time they measure it. Sketch the hairline starting roughly one eye height above the eyebrows, adjusting for hairstyle and hair thickness.
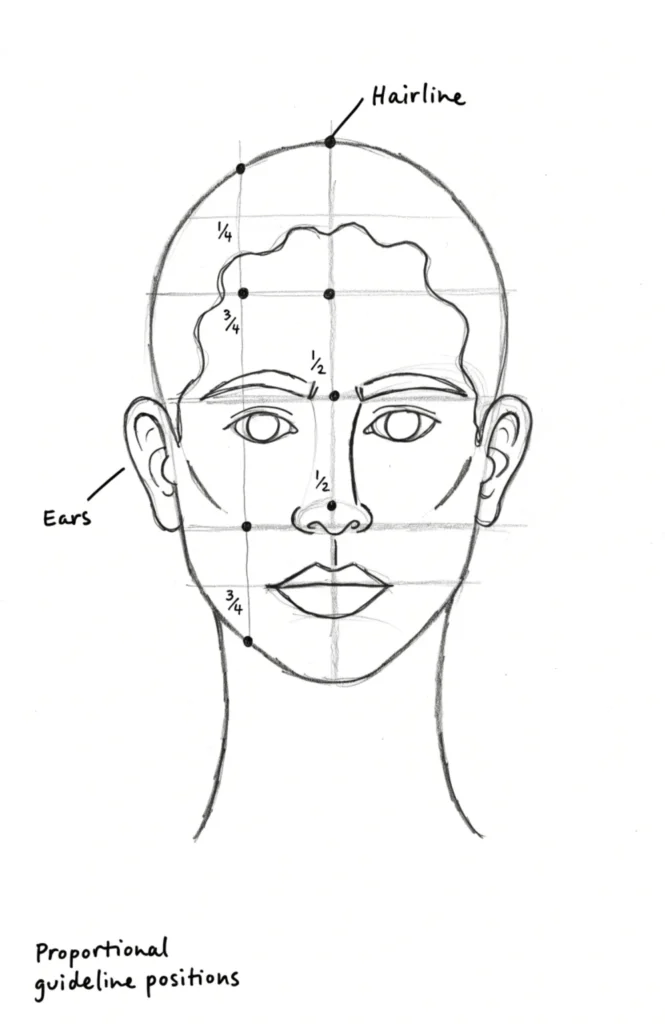
These two details are easy to rush past, but getting them roughly in the right place makes a noticeable difference in how balanced the finished face looks.
Step 8: Shade for Dimension
Using your softer pencil, add light shading beneath the cheekbones, along the side of the nose, and under the chin to suggest the way light naturally falls across a face. Leave the forehead, bridge of the nose, and cheekbones slightly lighter, since those areas typically catch the most light.
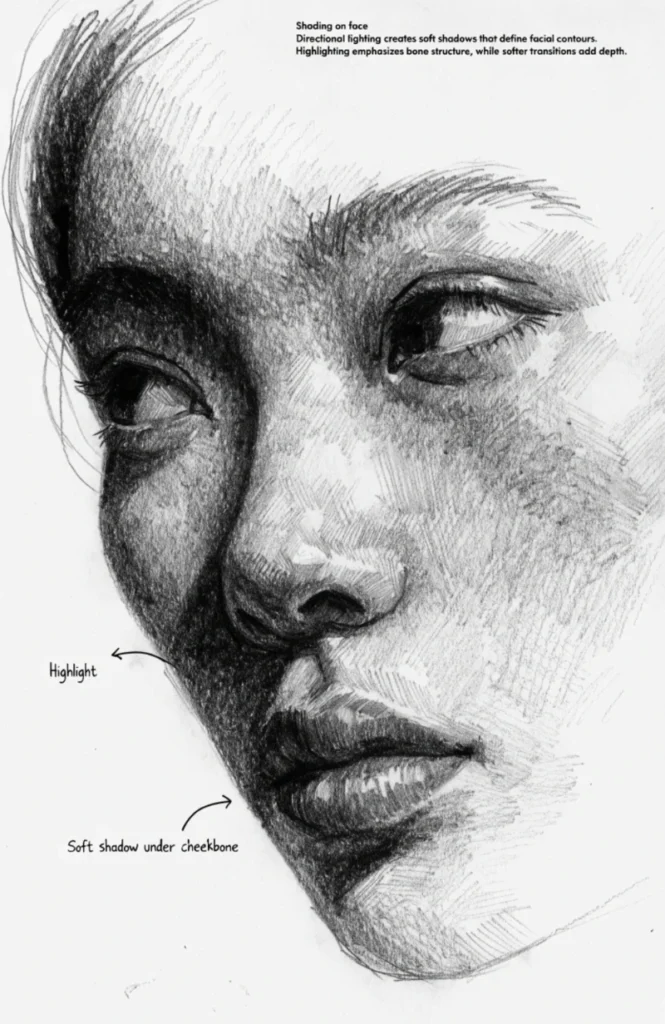
Blending these shaded areas gently with a fingertip or blending stump softens the transitions and gives the face a rounded, three dimensional feel instead of looking flat.
Step 9: Erase Guidelines and Refine
Once all the features are in place, gently erase the original center guidelines and any construction marks that are no longer needed. Go back over the features you want to keep with a bit more confident pencil pressure to bring them forward.
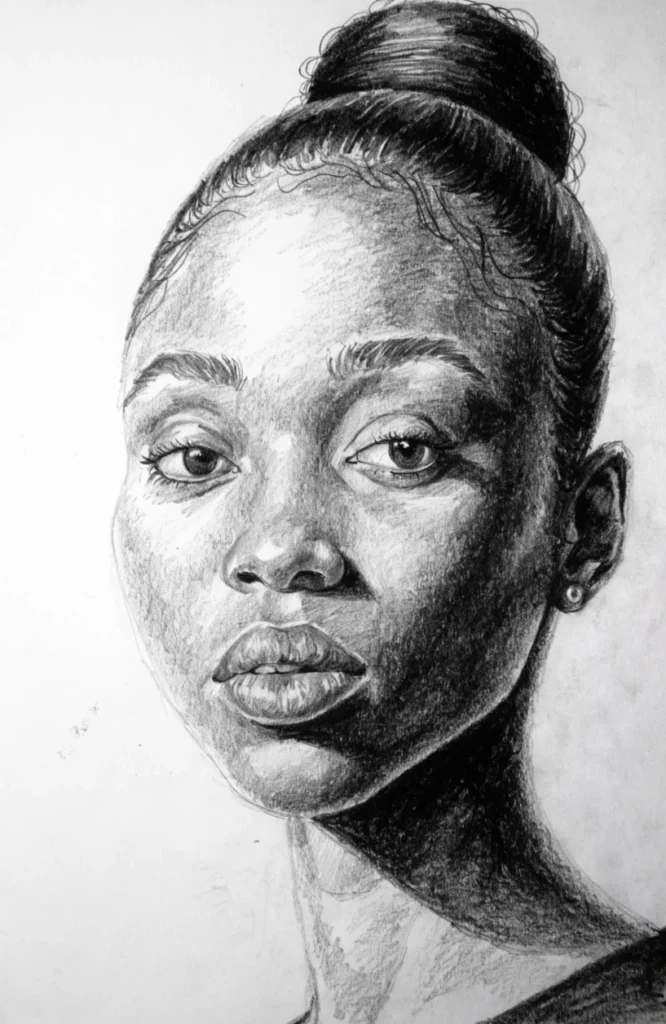
This cleanup step is often when a sketch starts to look like a genuine drawing rather than a diagram, so take your time smoothing out any leftover construction lines.
A few things that make faces look more natural
Real faces are rarely perfectly symmetrical, so resist the urge to make both sides match exactly, since a bit of natural asymmetry actually reads as more lifelike. It also helps to vary your line weight, pressing a little harder for areas like the eyelids and lips and lighter for softer transitions like the cheeks, since a single uniform pressure throughout tends to flatten the whole drawing.
Final Thoughts
Drawing a convincing face comes down to trusting the guidelines rather than trying to place every feature by eye alone, especially while you are still learning. Once the eye line, nose measurement, and mouth position become second nature, you can start adjusting them on purpose to draw faces with more personality, whether that means wider set eyes, a longer chin, or any other variation from the baseline proportions.
Practice this same guideline process a few times in a row, even quickly, and you will likely notice the proportions start to feel more automatic with each attempt.